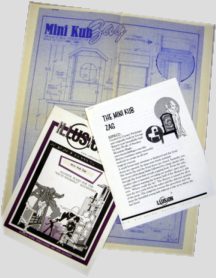
 I have finally had a chance to sit down with Osborne Illusion Systems’ blueprints for the Mini Kube Zag to analyze them. Besides Gunter Puchinger (the inventor of the Mini Kub Zag) and George Kimery of Chalet Magic (the U.S. rights holder), I am arguably the person most familiar with the construction of this illusion. Having built more than a dozen of these in the past few years, all under license by Chalet, I feel qualified to give my review.
Granted, many believe that I am biased; that Osborne’s publication of these plans would damage my business of building and selling authorized Mini Kub Zags. It might. It might not. That remains to be seen. Be that as it may, I do promise to be as fair and objective as possible and just stick to the facts — comparing his plans to the authorized version.
First, the prop described in Osborne’s plans does not break down for transport like the original. No suggestions are given regarding how to make it do so.
The hexagonal openings are off-center by two inches or more, possibly tipping the method. The tubes are also smaller and their “handles” narrower than the original, which would seem to make the tubes appear even smaller (and thus less deceptive) to the audience. But to be fair, the handle rims couldn’t be any wider in his design or they would strike the handle of the blade. He indicates that tubes themselves are fabricated from plexiglass (?), but no details are given on how to actually construct them.
Plywood hole covers are described, along with the use of Velcro to keep them in place…to provide that lovely “r-r-r-rip” sound when you remove them. The curtain flaps over the openings are mentioned, but no method is suggested for keeping them from poking back out through the hole — unsightly and possibly revealing.
However, all of that is purely cosmetic. The more serious discrepancies are the safety issues.
Gone is the steel framework featured in the original that supports the assistant’s weight. A metal bar is indeed used in one area, but he suggests it could also be wooden if you desire. From an engineering standpoint, there is a LOT of stress on the bottom of that bar — the attachment of which is never clearly explained in the drawings or text.
The interior shelf has also been eliminated, giving the assistant nothing to brace herself against in her awkward position…leaving no choice but to trust her full weight to a piece of 1/4″ plastic.
There are other deviations from the original design that make the prop infinitely less deceptive, but I cannot discuss them in detail here without publicly revealing the secret. Suffice to say that the one “weak spot” on the illusion — the one we try to minimize — has been made 20% BIGGER in his design.
Osborne confessed to me in an email that he had only seen performances of this illusion and had never examined an authorized Mini Kub Zag before drawing these plans. That much is clear.
Regarding the information on the blueprint itself, MANY important dimensions are sadly missing; simple ones such as “How wide is the cabinet?” There is actually one spot on the plan where brackets are clearly drawn for a dimension, but there is no number in it. (That seems a bit careless.) Of course, as with all Osborne Illusion Systems blueprints, you can always find the omitted dimensions using an architect’s scale and a bit of math.
Anyone capable of doing that should be able to solve the myriad of other mysteries in this plan. Like what? Well, the entire construction of the base is, for the most part, left completely to the imagination. No cross-sections. No explanation. It’s just kind of “there.”
Accompanying the blueprint are four pages of instructions — five actually (the first page is filled with the ad-copy from his website) — but few things are explained in depth. One notable exception is a fully illustrated description of how to pluck the cam caches from the end of a roller blind. How you actually attach that roller blind to the prop is a bit sketchy, though.
Bottom line, the Mini Kub Zag is a fairly complex prop that must be built to some fairly tight tolerances to work properly. If you intend to purchase this plan with the idea of building one for yourself, be prepared to do a LOT of figuring, fiddling and engineering of your own.
This plan could possibly be rudimentary starting point, but not much. If you DO possess the necessary skills to turn this blueprint into an actual working prop, you might be just as well served by saving your money, watching YouTube performance videos (as Osborne admittedly did) and drawing up your own blueprints from scratch.
Dan Wolfe, Owner
Smoky Mountain Magic
October 2008
